
How to Install a Screen Protector Without Bubbles
Installing a screen protector may seem straightforward, but it's surprisingly easy to end up with trapped air bubbles, dust particles, or uneven alignment. These small installation mistakes can affect touch responsiveness, reduce screen clarity, and make your phone look untidy. The good news is that with the right preparation, proper tools, and a careful approach, you can achieve a clean, bubble-free installation at home.
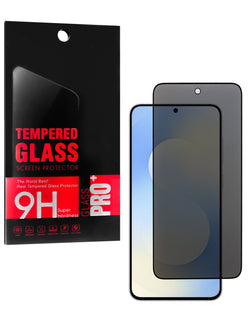
A quality screen protector is one of the best investments you can make for your smartphone. It helps shield the display from scratches, fingerprints, and everyday wear while reducing the risk of costly screen repairs. For complete device protection, it's also worth installing a camera protector to safeguard your phone's lenses from scratches without compromising photo quality. In this guide, you'll learn how to install both a screen protector and a camera protector correctly, avoid common installation mistakes, and keep your device looking like new.
Why a Screen Protector Is Important
Your smartphone goes everywhere with you. Whether it's in your pocket, backpack, or on your desk, it is constantly exposed to scratches, accidental drops, dust, and everyday wear. Even small particles like keys or coins can leave permanent marks on your display.
A quality screen protector acts as a protective layer between your phone's display and daily hazards.
-
Protects Against Scratches: Small scratches may not seem like a big problem at first, but they can quickly build up over time. A tempered glass screen protector absorbs these minor scratches before they reach your phone's original display.
-
Reduces Repair Costs: Replacing a cracked smartphone screen can be expensive. Installing a screen protector costs only a fraction of the price and can help reduce the risk of costly repairs.
-
Maintains Screen Clarity: Modern tempered glass protectors are designed to provide crystal-clear visibility without affecting brightness or color quality. When installed correctly, they are almost invisible.
-
Preserves Touch Sensitivity: High-quality protectors maintain your phone's natural touch response, allowing you to swipe, type, and play games without any noticeable difference.
-
Keeps Your Phone Looking New: A clean, scratch-free display improves the overall appearance of your smartphone and helps maintain its resale value if you decide to upgrade later.
Don't Forget Your Camera
Many smartphone users focus only on the display while ignoring the camera lenses. Since camera bumps extend beyond the phone's body, they are more likely to come into contact with hard surfaces.
Using Camera Lens Protectors provides an extra layer of protection against scratches, dust, and accidental impacts. These protectors are specially designed to fit over your camera lenses without reducing image quality.
Adding a Camera Screen Protector alongside your display protector ensures complete protection for your smartphone.
Types of Screen Protectors
Protect your smartphone with premium tempered glass screen protectors designed for everyday durability, crystal-clear viewing, and responsive touch performance. Whether you use an iPhone or a Samsung Galaxy device, our collection offers reliable protection against scratches, drops, fingerprints, and daily wear while maintaining your screen's original clarity.
Samsung Screen Protectors
Keep your Galaxy device protected with high-quality Samsung screen protectors built for superior durability and HD display clarity. Our collection includes clear tempered glass, privacy screen protectors, anti-spy glass, and case-friendly designs compatible with a wide range of Samsung Galaxy models.
Browse popular options including:
- Galaxy S25 FE 5G Privacy Tempered Glass
- Galaxy S25 FE 5G Clear Tempered Glass
- Galaxy S26 Ultra Privacy Tempered Glass
- And many more Samsung Galaxy screen protectors
Perfect for daily use, gaming, travel, and work, these protectors offer dependable performance without compromising touch sensitivity.
Key Features
- 9H hardness for scratch and impact resistance
- Privacy glass options to protect sensitive information
- Crystal-clear HD display quality
- Case-friendly design with precise edge coverage
- Smooth, responsive touch for scrolling and gaming
- Bubble-free, easy installation
Our Samsung screen protectors combine premium tempered glass durability with reliable everyday protection.
iPhone Screen Protectors
Protect your iPhone with premium tempered glass screen protectors engineered for maximum durability, scratch resistance, and exceptional display clarity. Our collection includes clear tempered glass, privacy glass, and matte tempered glass options for a wide range of iPhone models.
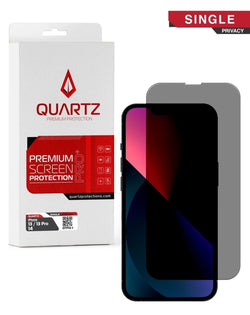
Explore popular products such as:
- QUARTZ Privacy Tempered Glass for iPhone 13 Mini
- QUARTZ Matte Tempered Glass for iPhone 13 Pro Max / 14 Plus
- QUARTZ Privacy Tempered Glass for iPhone 14 Pro Max
- Plus many more iPhone screen protectors
Designed for everyday protection, these screen protectors help preserve your display while maintaining smooth touch responsiveness and a premium viewing experience.
Key Features
- 9H hardness for superior protection
- Privacy, matte, and clear glass options
- Scratch, drop, and impact resistance
- Ultra-smooth touch response
- Bubble-free installation
- Premium QUARTZ tempered glass construction
Our iPhone screen protectors deliver dependable protection, exceptional clarity, and long-lasting performance for your device.
Why Bubbles Appear During Installation
One of the most common problems people face when applying a screen protector is the appearance of bubbles. These bubbles can make the screen look uneven and may reduce the overall appearance of your phone. Fortunately, most bubbles are caused by simple installation mistakes that can be avoided with the right technique.
Dust Particles on the Screen: Dust is the biggest reason bubbles form under a screen protector. Even a tiny dust particle can create a noticeable air pocket that prevents the protector from sticking properly.
Before installing your screen protector, always clean your phone thoroughly using the supplied alcohol wipe and microfiber cloth. It's also a good idea to use a dust removal sticker to pick up any remaining particles.
Incorrect Alignment: Placing the screen protector incorrectly on the first attempt often creates bubbles. If the protector is shifted to one side or lowered unevenly, air can become trapped underneath.
Take a few moments to carefully align the protector with the front camera, speaker, and edges of the phone before letting it touch the screen. A slow and steady installation usually produces the best results.
Applying the Protector Too Quickly: Many people rush the installation process. Dropping the protector onto the screen all at once can trap air between the glass and the display.Instead, begin by aligning one edge of the protector and slowly lower it onto the screen. As it attaches, the adhesive naturally pushes most of the air outward.
Allow the protector to settle naturally rather than pressing it down forcefully.
Dirty or Oily Screen: Fingerprints, skin oils, and smudges prevent the adhesive from making full contact with the screen. This can lead to air bubbles and weak adhesion. Always wash and dry your hands before installation, and avoid touching the adhesive side of the screen protector.
Cleaning the display thoroughly before installation is one of the easiest ways to prevent bubbles.
Reusing an Old Screen Protector: Once a screen protector has been removed, the adhesive can collect dust and lose its effectiveness. Reapplying the same protector often results in bubbles, poor adhesion, and uneven edges.
If you remove a protector by mistake or it becomes contaminated with dust, replacing it with a new one usually gives better results.
Installing in a Dusty Environment: The environment plays a bigger role than many people realize. Dust floating in the air can settle on your phone while you're installing the protector.Avoid installing your screen protector in places with fans running, open windows, or excessive airflow.
Many people prefer installing it after a hot shower because the steam helps reduce airborne dust.
Things You'll Need Before Installation
Having the right tools ready before you begin makes the installation process much easier and increases your chances of getting a bubble-free finish.
Most quality screen protector kits include everything you need, but it's always helpful to check before starting.
-
Screen Protector: Choose a high-quality tempered glass or film screen protector designed specifically for your smartphone model. A properly sized protector fits better and reduces the risk of bubbles or lifting around the edges.
-
Alcohol Cleaning Wipe: An alcohol wipe removes fingerprints, oils, and dirt from the screen. Cleaning the display thoroughly ensures the adhesive bonds evenly to the surface.Never skip this step, even if your screen looks clean.
-
Microfiber Cloth: After using the alcohol wipe, dry the screen with a clean microfiber cloth. This removes any remaining moisture and leaves the display spotless without causing scratches.
-
Dust Removal Stickers: Dust removal stickers are one of the most useful tools during installation. They lift tiny dust particles that may not be visible but can still cause bubbles.Simply press the sticker gently onto the screen to remove any remaining debris before applying the protector.
-
Squeegee or Plastic Card: Many installation kits include a small squeegee. If yours doesn't, you can use a clean plastic card wrapped in a soft microfiber cloth.This tool helps push trapped air toward the edges after the protector has been installed.
-
Good Lighting: Bright lighting makes it easier to spot dust, fingerprints, and alignment issues before applying the protector.Natural daylight or a bright desk lamp works well.
-
Clean Hands: Wash and dry your hands before starting. Clean hands reduce the chance of transferring oils or dust to the adhesive side of the screen protector.Avoid touching the sticky side once you remove the protective film.
-
A Dust-Free Workspace: Choose a clean, flat surface where you can work comfortably. Avoid areas with fans, open windows, or heavy air movement.A clean environment significantly improves your chances of achieving a perfect installation
Step-by-Step Guide to Install a Screen Protector Without Bubbles
Installing a screen protector doesn't have to be difficult. By following the correct steps and taking your time, you can achieve a smooth, bubble-free finish that looks professionally installed. The key is to work in a clean environment and avoid rushing the process.
Follow these steps carefully for the best results.
Step 1: Wash and Dry Your Hands
Before touching your phone or the screen protector, wash your hands with soap and water. Dry them completely using a lint-free towel.
Clean hands help prevent fingerprints, dust, and oil from transferring to the screen or adhesive side of the protector.
Step 2: Choose a Clean Workspace
Select a flat, clean surface with good lighting. A room with minimal dust is the best place to install a screen protector.
Many people prefer installing it in the bathroom after running a hot shower for a few minutes. The moisture helps reduce airborne dust, making it easier to achieve a bubble-free installation.
Step 3: Clean the Phone Screen Thoroughly
A spotless screen is essential for a successful installation.Use the alcohol wipe included in your installation kit to remove fingerprints, grease, and dirt. Then dry the screen with a microfiber cloth until it is completely clean.
Finally, use a dust removal sticker to lift any tiny dust particles that may still be on the display.
Hold the phone under bright light from different angles to check for dust or smudges before moving to the next step.
Step 4: Test the Alignment
Before removing the protective film, place the screen protector on top of your phone to see how it fits.
Check that:
-
The front camera lines up correctly.
-
The speaker cutout is properly positioned.
-
The edges are evenly aligned.
-
Buttons and sensors are not covered.
Taking a few extra seconds to test the alignment can prevent mistakes later.
Step 5: Remove the Protective Film
Carefully peel off the backing film from the screen protector.Try not to touch the adhesive side with your fingers, as oils and fingerprints can affect the adhesive and create bubbles.Hold the protector by its edges during this step.
Step 6: Align the Screen Protector
Slowly position the screen protector over your phone.Make sure it is centered before lowering it onto the display.Some screen protectors come with installation frames that automatically help with alignment. If your protector includes one, use it for a quicker and more accurate installation.
Take your time—good alignment is one of the most important steps.
Step 7: Lower the Protector Slowly
Instead of dropping the protector onto the screen, gently lower one end first and then slowly allow the rest of the protector to settle onto the display.As the adhesive makes contact, it will naturally spread across the screen.You will notice the protector beginning to stick on its own.
Avoid pressing too hard during this step.
Step 8: Remove Air Bubbles
Once the protector is attached, you may notice a few small air bubbles.Use the included squeegee or a plastic card wrapped in a microfiber cloth to gently push the bubbles toward the nearest edge.Start from the center and move outward using slow, even strokes.
Most air bubbles disappear within a few minutes.
Step 9: Check for Dust
If you notice one bubble that won't move, a dust particle is probably trapped underneath.Carefully lift the nearest corner of the screen protector using a dust removal sticker or fingernail.Use another dust removal sticker to remove the dust from the screen.Slowly lower the protector back into place.
Avoid lifting the protector multiple times, as this increases the chance of collecting more dust.
Step 10: Press Around the Edges
Once all visible bubbles have been removed, gently press around the edges of the protector.This helps ensure the adhesive bonds evenly across the entire display.Pay special attention to the corners, as these are the areas most likely to lift if not properly sealed.
Step 11: Let the Adhesive Set
Although the protector is ready to use immediately, allowing it to sit undisturbed for a few hours helps the adhesive bond more effectively.
During this time:
-
Avoid removing and reinstalling the protector.
-
Do not press hard on the screen.
-
Keep the phone away from excessive moisture or dust.
Some tiny edge bubbles may disappear naturally as the adhesive settles.
Tips for a Perfect Bubble-Free Installation
Following a few simple tips can make the installation process even easier.
-
Work Slowly: Rushing often leads to dust, misalignment, and trapped air. Taking an extra minute can make a big difference.
-
Keep Dust Away: Dust is the number one cause of installation problems. Always clean your workspace and screen before starting.
-
Never Touch the Adhesive Side: Touching the sticky surface leaves fingerprints and reduces adhesion.
-
Use Quality Accessories: A high-quality screen protector provides better adhesive, improved clarity, and easier installation than cheaper alternatives.
-
Replace Damaged Protectors: If the protector becomes cracked or loses its adhesive after removal, install a new one instead of trying to reuse it.
Common Mistakes to Avoid When Installing a Screen Protector
Even with a high-quality screen protector, small mistakes during installation can lead to bubbles, dust, or poor alignment. Knowing what to avoid can save you time and help you achieve a clean, professional-looking finish.
Skipping the Cleaning Step
One of the biggest mistakes is applying the screen protector without properly cleaning the display. Dust, fingerprints, and oil can prevent the adhesive from sticking evenly, resulting in bubbles or lifting edges.
Always clean the screen using an alcohol wipe, dry it with a microfiber cloth, and use a dust removal sticker before installation.
Installing in a Dusty Environment
Dust floating in the air can settle on your phone while you're installing the protector.
Choose a clean room with minimal airflow. Avoid installing near open windows, fans, or air conditioners, as they can carry dust onto your screen.
Rushing the Installation
Many people try to install the protector as quickly as possible, which often leads to poor alignment and trapped air.
Take your time. Carefully line up the protector before lowering it onto the screen.
Touching the Adhesive Side
The adhesive layer is designed to stick directly to your phone's screen. Touching it with your fingers leaves behind oils and fingerprints that reduce its effectiveness.
Always hold the screen protector by its edges.
Applying Too Much Pressure
Pressing hard on the protector during installation can create uneven pressure and may even damage the glass.
Instead, let the adhesive spread naturally and gently remove any remaining air bubbles with a squeegee or plastic card.
Using the Wrong Screen Protector
Not all screen protectors are designed for every smartphone. Using the wrong size can leave gaps, cover sensors, or cause the edges to lift.
Always choose a protector made specifically for your phone model.
How to Remove Dust Bubbles
Dust bubbles are different from air bubbles. If a bubble doesn't move when you push it toward the edge, a tiny dust particle is usually trapped underneath.
Fortunately, you don't need to replace the entire screen protector.
-
Step 1: Find the Dust Bubble: Hold your phone under bright light and identify the bubble that won't disappear.Dust bubbles usually stay in the same spot even after applying pressure.
-
Step 2: Lift One Corner Carefully: Using your fingernail or a dust removal sticker, gently lift the nearest corner of the screen protector.Avoid bending the protector too much, as this can damage it.
-
Step 3: Remove the Dust: Use a dust removal sticker or a piece of adhesive tape to lift the dust particle from the phone screen.Do not wipe the adhesive side with your fingers or cloth, as this may leave residue.
-
Step 4: Reapply the Protector: Slowly place the screen protector back onto the display.Press gently from the center toward the edges to remove any remaining air.If the screen is completely clean, the dust bubble should disappear.
How to Fix Air Bubbles
Unlike dust bubbles, air bubbles occur when air becomes trapped between the screen and the protector.These bubbles are much easier to remove.
-
Push the Bubble Toward the Edge: Use a microfiber-covered plastic card or the installation squeegee.Start from the center of the bubble and slowly push it toward the nearest edge of the screen.Use smooth, gentle strokes instead of pressing hard.
-
Wait for Small Bubbles to Disappear: Very tiny bubbles often disappear naturally within 24 to 48 hours as the adhesive settles.Avoid removing the screen protector immediately unless the bubbles remain after two days.
-
Lift and Reapply If Necessary: If a large air bubble refuses to disappear, carefully lift the nearest corner and slowly lay the protector back down.This allows trapped air to escape.
How to Install a Camera Protector Properly
Your smartphone's camera is just as important as its display. Modern phones have large camera lenses that stick out slightly, making them more vulnerable to scratches and accidental damage.
Installing a Camera Protector helps keep your lenses safe without affecting photo or video quality.
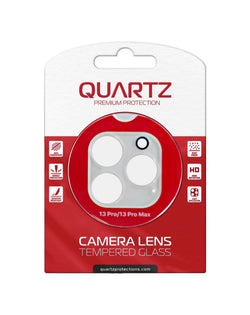
Clean the Camera Area: Use an alcohol wipe and microfiber cloth to remove fingerprints, dust, and dirt from the camera lenses.A clean surface helps the protector stick properly.
Check the Alignment: Before removing the adhesive backing, place the Camera Protector over the camera module to ensure the cutouts match perfectly.Take a moment to confirm the position.
Remove the Protective Film: Peel off the backing carefully without touching the adhesive, Hold the protector by the edges.
Apply the Camera Protector: Align it with the camera lenses and slowly lower it into place. Lightly press around each lens so the adhesive bonds evenly.
Remove Any Air Bubbles: If small bubbles appear, gently press them toward the edge using a microfiber cloth. Most premium Camera Protectors automatically bond without trapping air.
Why You Should Use a Camera Screen Protector
Many smartphone users invest in a strong screen protector but leave the camera lenses exposed.This can lead to scratches that reduce photo quality over time.A Camera Screen Protector provides an extra layer of protection while maintaining clear images and videos.
-
Protects Against Scratches: Your phone's camera often comes into contact with tables, keys, and other hard objects.A camera protector helps prevent permanent scratches on the lens.
-
Maintains Image Quality: High-quality Camera Screen Protectors are made from ultra-clear tempered glass that allows light to pass through naturally.This means you can continue taking sharp, detailed photos without noticeable distortion.
-
Easy to Replace: If the protector becomes scratched or cracked, replacing it is much cheaper than repairing or replacing the camera lens itself.
Why Buy Screen Protectors from Banana Cell Solutions?
Choosing the right screen protector is just as important as installing it correctly. At Banana Cell Solutions, you'll find premium-quality screen protectors designed to provide reliable protection without compromising your phone's display clarity or touch sensitivity. Whether you're looking for a tempered glass screen protector or a camera protector, our products are made to fit your device precisely for easy, bubble-free installation.
When you shop with Banana Cell Solutions, you benefit from:
- Premium tempered glass for superior scratch and impact resistance.
- Crystal-clear transparency that preserves your screen's original brightness and color accuracy.
- High touch sensitivity for a smooth and responsive user experience.
- Precise fit for a wide range of iPhone and Android devices.
- Oleophobic coating that helps resist fingerprints, smudges, and oil buildup.
- Easy, bubble-free installation with strong adhesive technology.
- Durable camera protectors that safeguard your camera lenses without affecting photo or video quality.
- Affordable pricing without compromising on quality.
- Fast shipping and reliable customer support to ensure a hassle-free shopping experience.
Whether you've just purchased a new smartphone or want to extend the life of your current device, Banana Cell Solutions offers trusted accessories that help protect your investment. Pair your screen protector with a camera protector for complete front and rear protection, giving you peace of mind during everyday use.
Upgrade Your Phone Protection Today
Don't wait until your screen or camera lens gets scratched or damaged. Give your smartphone the protection it deserves with premium screen protectors and camera protectors from Banana Cell Solutions. Our high-quality accessories are designed for a perfect fit, crystal-clear visibility, responsive touch performance, and easy bubble-free installation.
Browse our collection today to find the right protection for your device and enjoy long-lasting durability with everyday peace of mind. Shop now and keep your phone looking and performing like new.
Frequently Asked Questions
Can I install a screen protector without professional help?
Yes. Most modern screen protectors are designed for easy installation. By following the proper steps and working in a clean environment, you can achieve a bubble-free result at home.
Why do bubbles appear under my screen protector?
Bubbles usually form because of trapped air, dust particles, fingerprints, or incorrect alignment during installation.Cleaning the screen thoroughly before applying the protector helps prevent this problem.
Will air bubbles disappear on their own?
Small air bubbles often disappear within 24 to 48 hours as the adhesive settles.If a bubble remains in the same place, it is likely caused by trapped dust.
Does a screen protector reduce touch sensitivity?
No. High-quality tempered glass protectors are designed to maintain the phone's original touch response. Cheap or damaged protectors may affect performance.
Is a Camera Protector really necessary?
Yes. Modern smartphone camera lenses are exposed and can easily become scratched. Using a Camera Protector helps protect your camera while maintaining excellent image quality.
Will a Camera Screen Protector affect photo quality?
No. Premium Camera Screen Protectors are made from ultra-clear tempered glass that allows light to pass through without affecting photo or video quality.
Are Camera Lens Protectors easy to install?
Yes. Most Camera Lens Protectors include adhesive backing and can be installed in just a few minutes after cleaning the camera area.
How long does a screen protector last?
A high-quality screen protector can last anywhere from one to two years, depending on daily use and how well it is maintained. Replace it sooner if it becomes cracked, scratched, or starts lifting around the edges.